Subathons are one of the most powerful ways to grow your channel and keep your audience engaged. By letting viewers add time with subscriptions, follows, donations, and more, you turn your stream into an interactive event that your community controls.
Whether you’re using Twitch or Kick, with Blerp’s Subathon Timer, you can easily create, manage, and display timers on your stream. Here’s how to set it up step by step.
Step 1: Open the Stream Editor
Go to Blerp and log in. Then click “Switch to Stream Editor.”
Step 2: Navigate to Timers
From the top navigation bar, select “Events” and then click “Timers.”
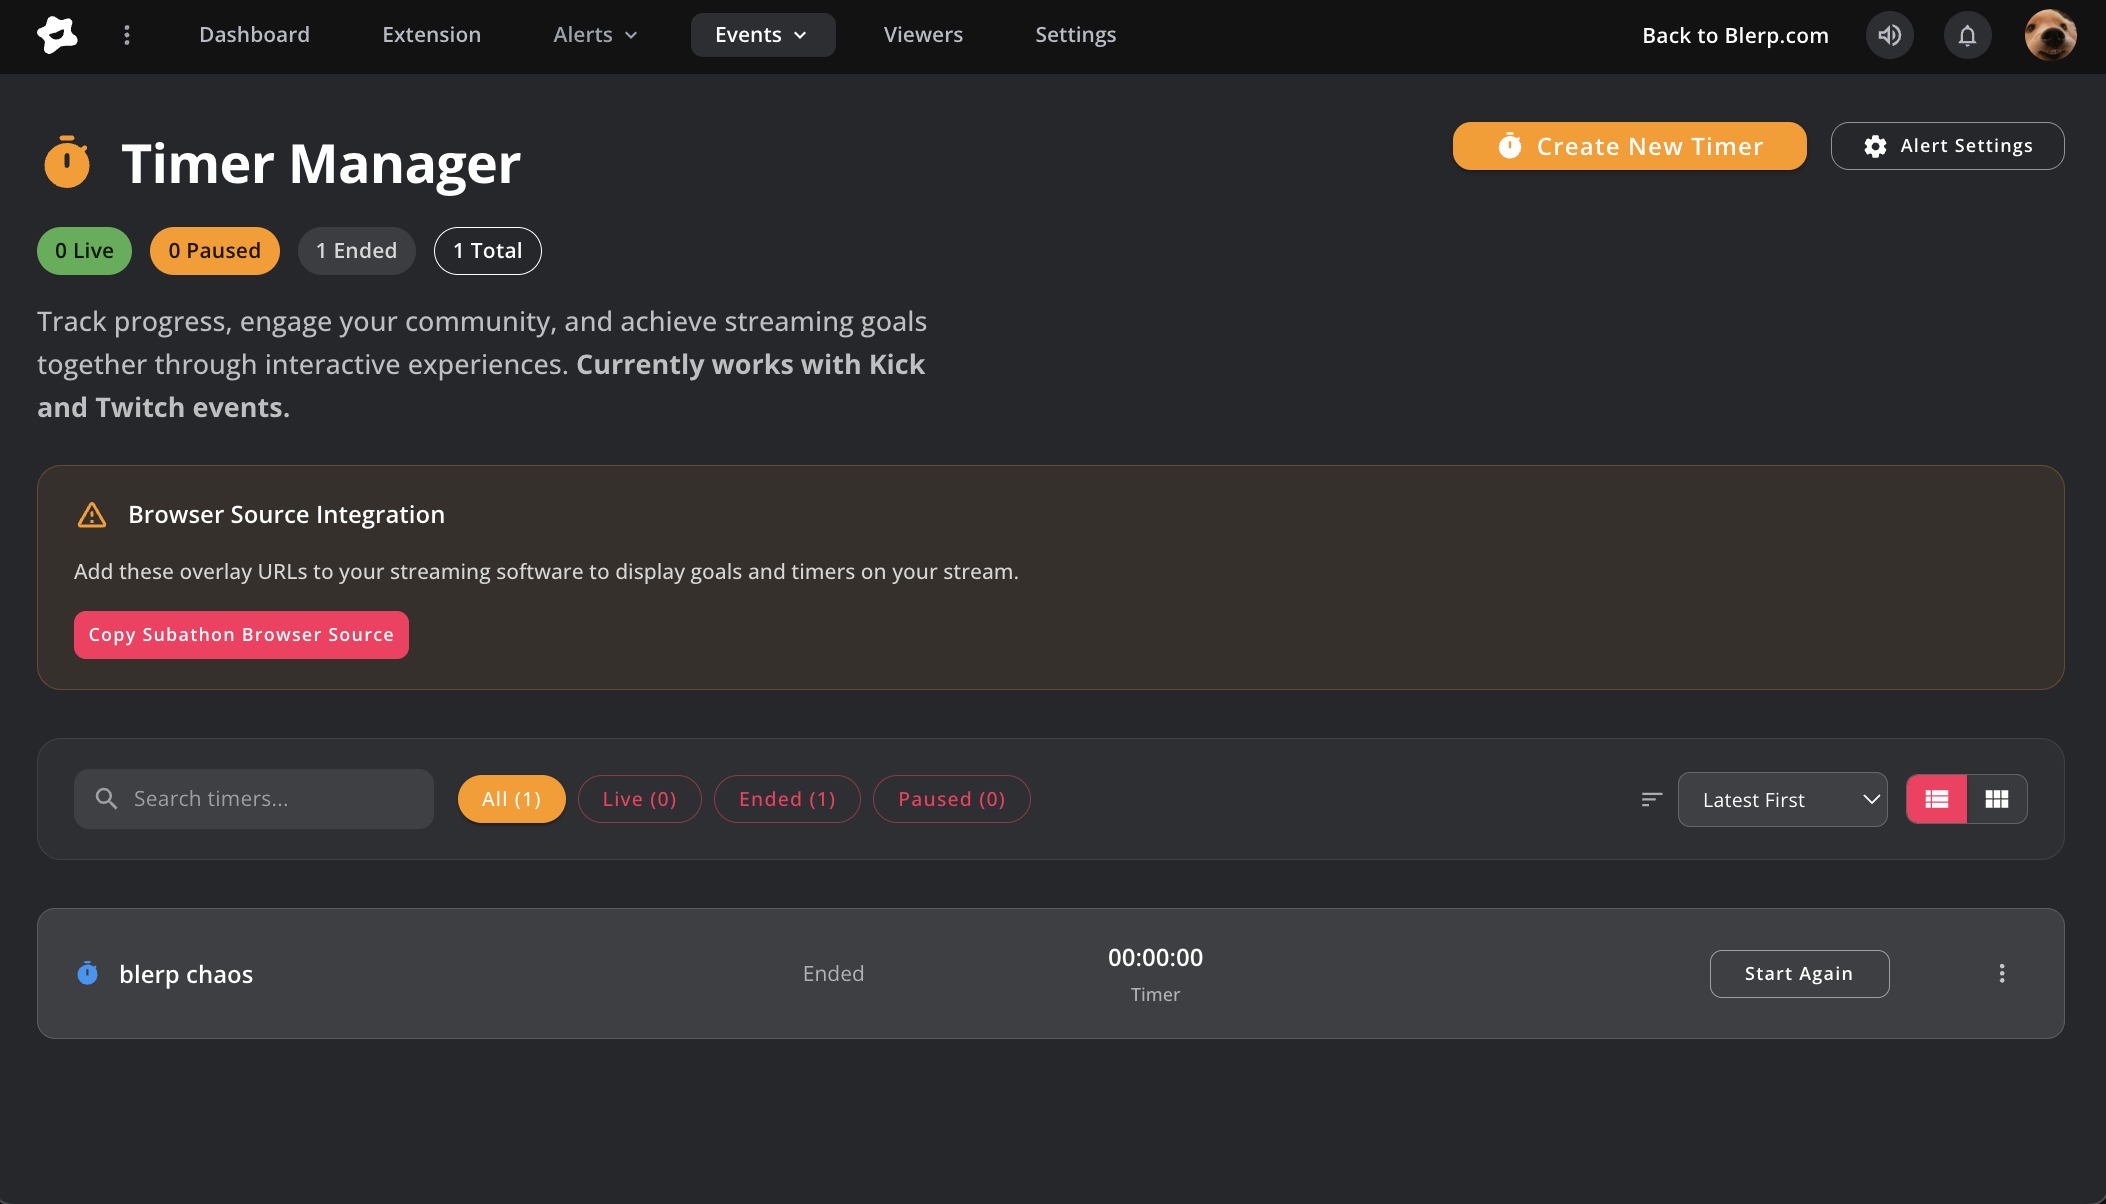
Step 3: Manage Your Subathon Timers
In the Timer Manager, you can:
- Create new timers
- Edit active timers
- Track live timers during your subathon
- End timers when your event is finished
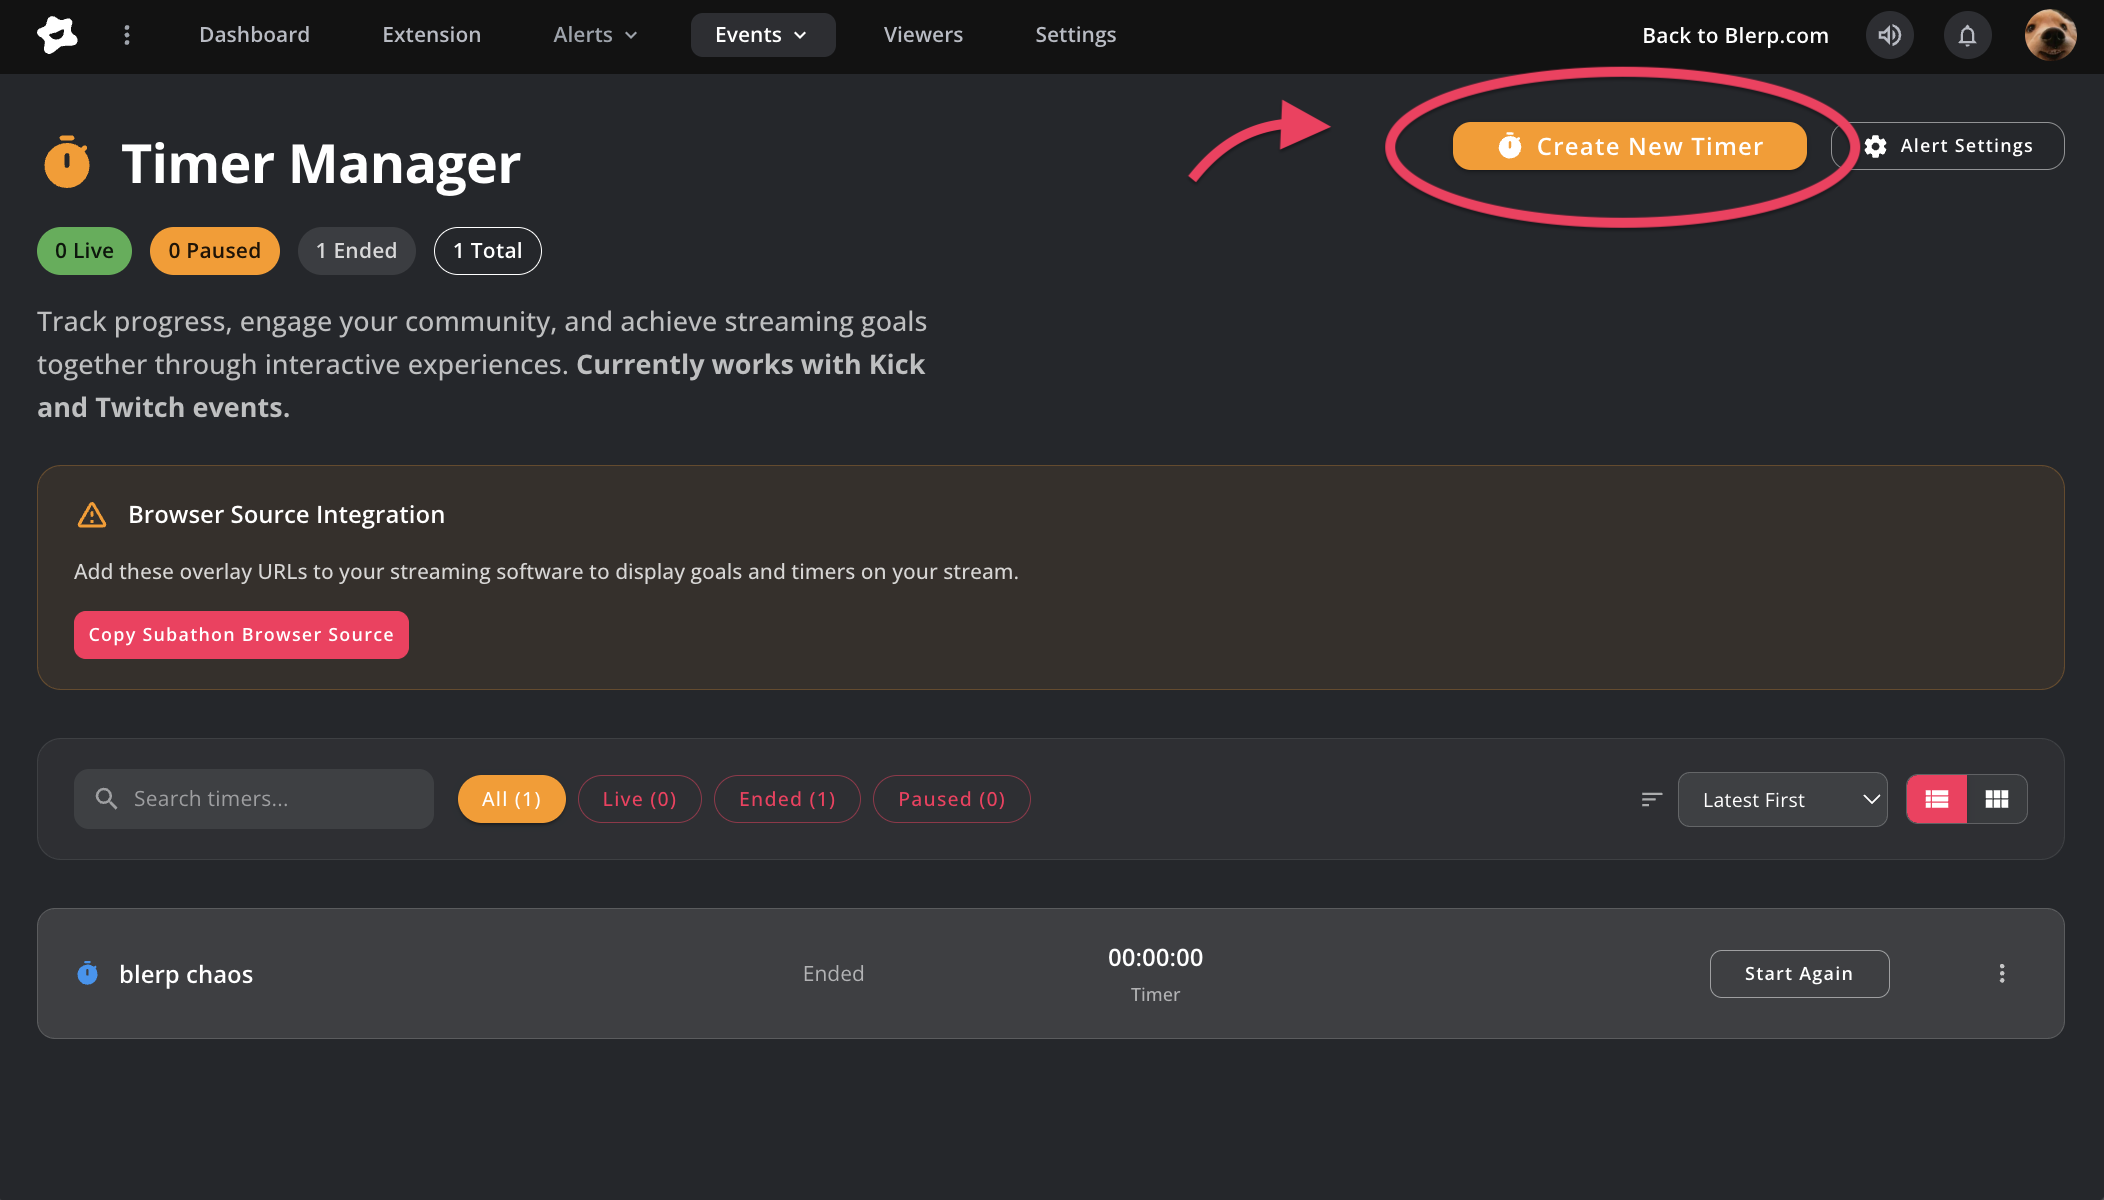
Step 4: Create a New Timer
Click “Create a new timer.”
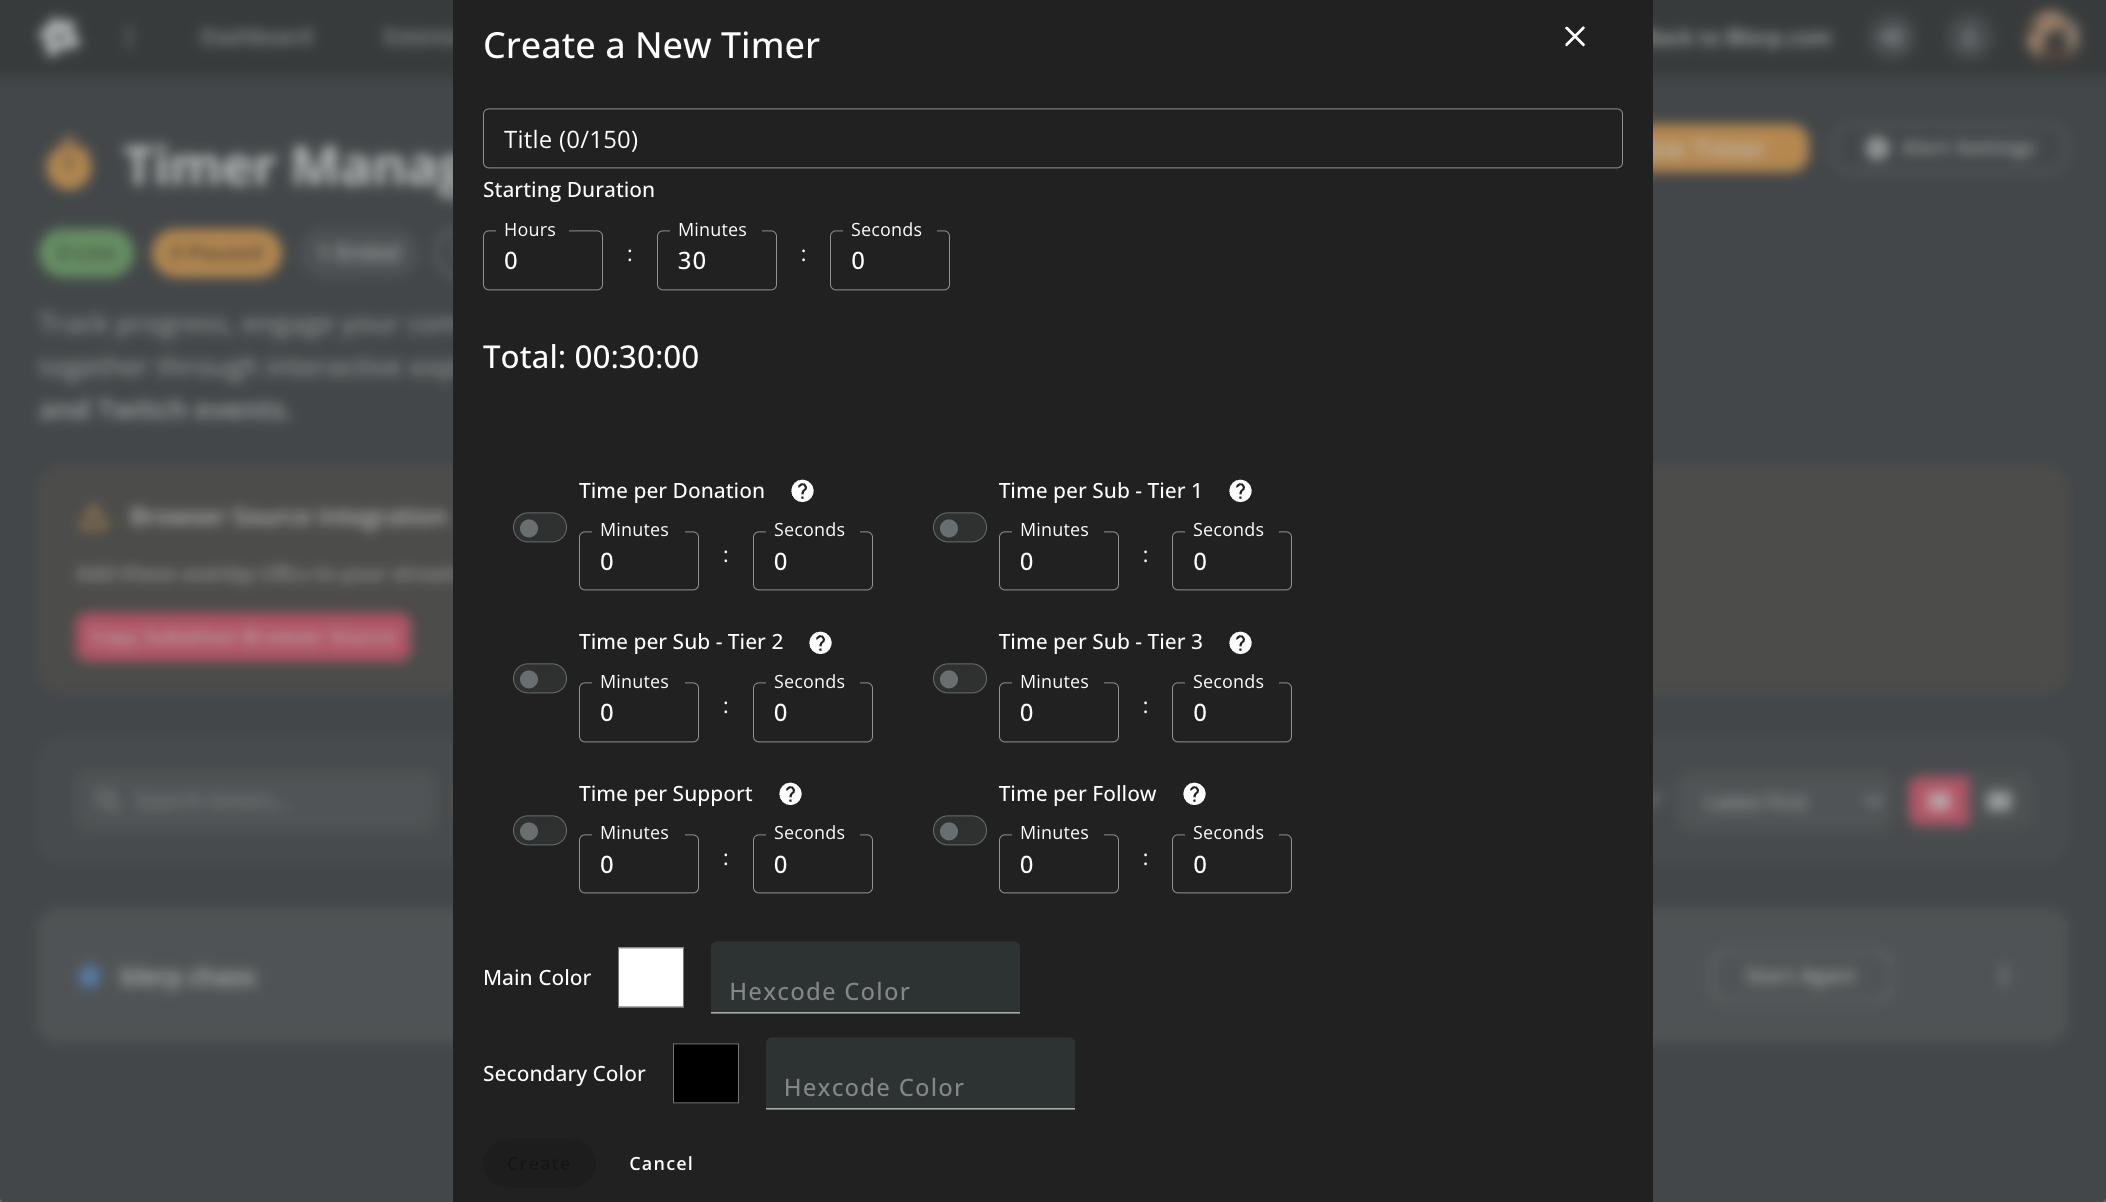
Customize your timer with:
- Title → Example: “Subathon Timer”
- Starting Duration → How much time your stream begins with
- Additional Time per Event → Add time for subs, follows, donations, or bit cheers
- Colors → Match your timer design to your stream brand
Step 5: Add the Timer to OBS or Streamlabs
Once your timer is set, copy the browser source URL from Blerp and paste it into OBS or Streamlabs as a browser source. This makes the timer visible on your stream for everyone to see.
You’re All Set!
Your Blerp Subathon Timer is now live and ready. With every follow, sub, or donation, your timer will update in real time, keeping your audience excited and motivated to push your stream even further.
Try it for your next subathon and let your viewers control how long you stay live!
 Ellyblerp